● Request 화면 코드 및 화면
<?xml version="1.0" encoding="utf-8"?>
<androidx.constraintlayout.widget.ConstraintLayout xmlns:android="http://schemas.android.com/apk/res/android"
    xmlns:app="http://schemas.android.com/apk/res-auto"
    xmlns:tools="http://schemas.android.com/tools"
    android:layout_width="match_parent"
    android:layout_height="match_parent"
    tools:context=".RequestActivity">

    <EditText
        android:id="@+id/etID"
        android:layout_width="wrap_content"
        android:layout_height="wrap_content"
        android:layout_marginTop="160dp"
        android:ems="10"
        android:hint="ID를 입력하세요"
        android:inputType="textPersonName"
        app:layout_constraintEnd_toEndOf="parent"
        app:layout_constraintStart_toStartOf="parent"
        app:layout_constraintTop_toTopOf="parent" />

    <EditText
        android:id="@+id/etPW"
        android:layout_width="wrap_content"
        android:layout_height="wrap_content"
        android:layout_marginTop="40dp"
        android:ems="10"
        android:hint="PW를 입력하세요"
        android:inputType="textPersonName"
        app:layout_constraintEnd_toEndOf="@+id/etID"
        app:layout_constraintStart_toStartOf="@+id/etID"
        app:layout_constraintTop_toBottomOf="@+id/etID" />

    <Button
        android:id="@+id/btnLogin"
        android:layout_width="wrap_content"
        android:layout_height="wrap_content"
        android:text="로그인"
        app:layout_constraintEnd_toEndOf="@+id/etPW"
        app:layout_constraintStart_toStartOf="@+id/etPW"
        app:layout_constraintTop_toBottomOf="@+id/etPW" />
</androidx.constraintlayout.widget.ConstraintLayout>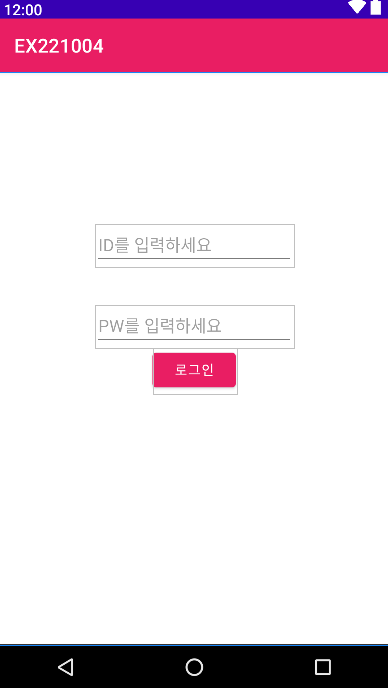
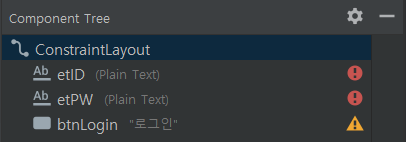
Request화면의 ID: - etID: ID입력창
- etPW: PW 입력창
- btnLogin: 로그인 버튼 -> 눌렀을시 로그인 성공여부 알려줌
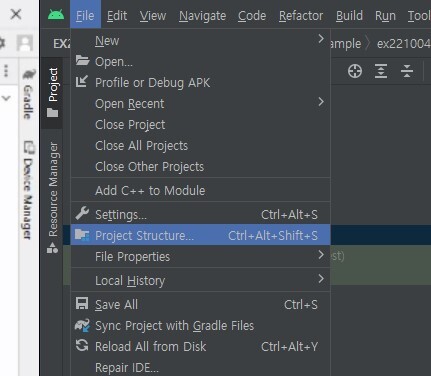
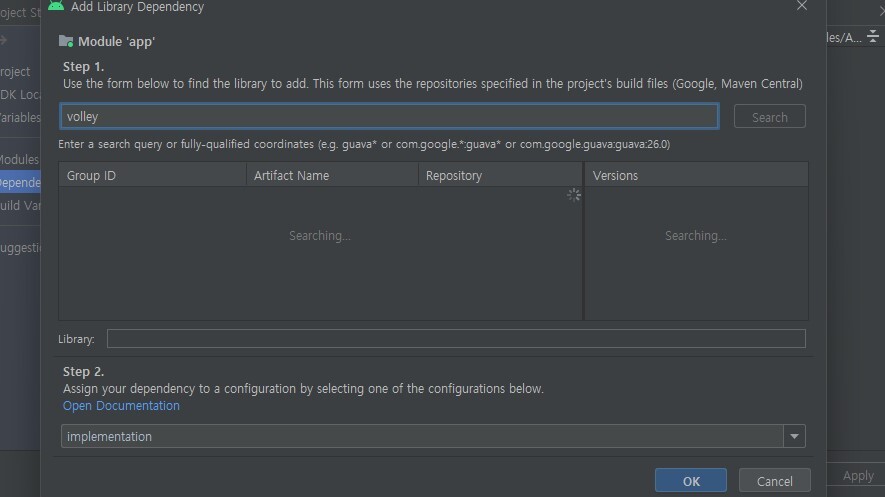
※ 네트워크 통신!!! Volley 라이브러리
- 가장 많이 사용하는 Volley 라이브러리
- 안드로이드 내장 라이브러리 X
- 외부 라이브러리!!
- build.gradle 안에 dependencies에
- 라이브러리 주소를 추가해도 되고
- 혹은 직접 검색 후 추가!!
- File -> Project Structure -> Dependencies -> '+' 누른 후 -> Library dependency
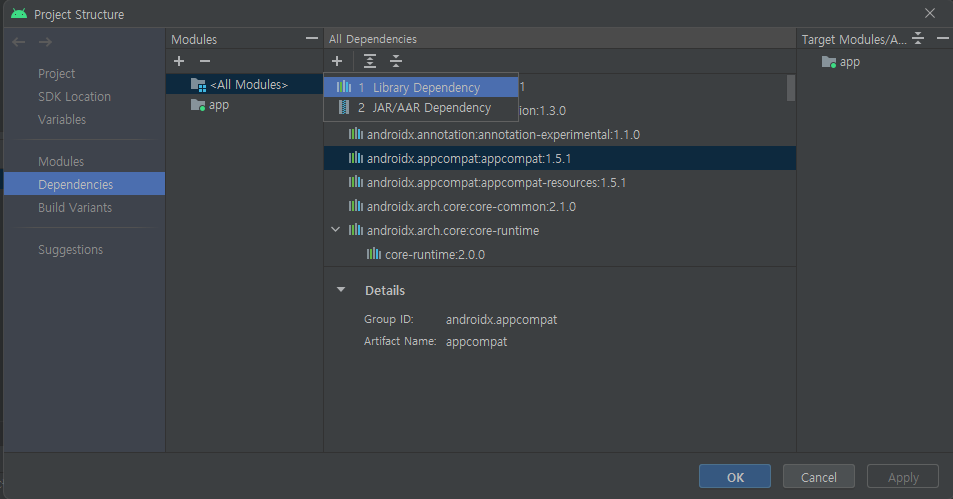
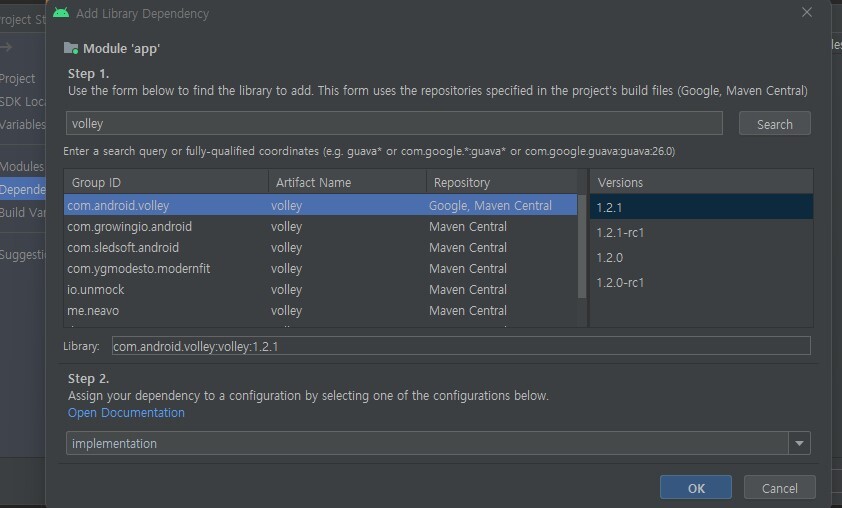
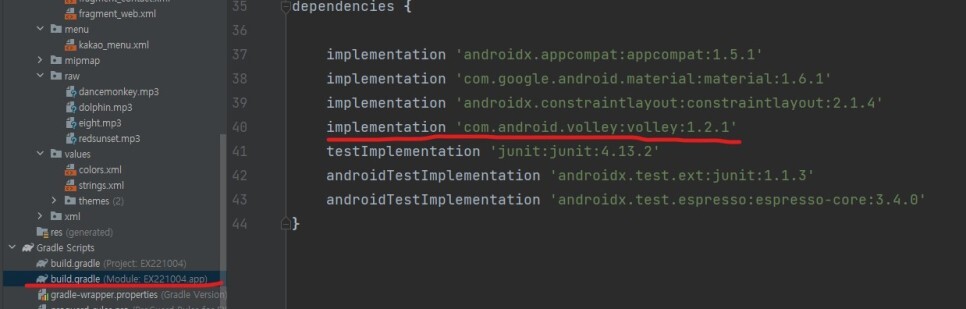
- Gradle Scripts의 2번째 build gradle에서 -> dependencies의
- implementation 'com.android.volley:volley:1.2.1' 확인
● Request Activity 소스코드
package com.example.ex221004;

import androidx.appcompat.app.AppCompatActivity;

import android.os.Bundle;
import android.widget.Toast;

import com.android.volley.Request;
import com.android.volley.RequestQueue;
import com.android.volley.Response;
import com.android.volley.VolleyError;
import com.android.volley.toolbox.StringRequest;
import com.android.volley.toolbox.Volley;
import com.example.ex221004.databinding.ActivityRequestBinding;

public class RequestActivity extends AppCompatActivity {

    ActivityRequestBinding binding;
    RequestQueue requestQueue;

    @Override
    protected void onCreate(Bundle savedInstanceState) {
        super.onCreate(savedInstanceState);
        binding = ActivityRequestBinding.inflate(getLayoutInflater());
        setContentView(binding.getRoot());

        // 0. Volley 라이브러리 추가
        // 1. RequestQueue 객체 생성
        if (requestQueue == null){
            requestQueue = Volley.newRequestQueue(getApplicationContext());
        }

        binding.btnLogin.setOnClickListener(v -> {
            // 2. Request 객체 생성
            String login_id = binding.etID.getText().toString();
            String login_pw = binding.etPW.getText().toString();

            String url = "http://192.168.70.91:5022/login";
            url += "?login_id=";
            url += login_id;
            url += "&login_pw=";
            url += login_pw;

            // 2. Request 객체 생성
            StringRequest request = new StringRequest(
                    Request.Method.GET,
                    url,
                    new Response.Listener<String>() {
                        @Override
                        public void onResponse(String response) {
                            // 응답 성공 시
                            Toast.makeText(RequestActivity.this, login_id + "님 환영합니다", Toast.LENGTH_SHORT).show();
                        }
                    },
                    new Response.ErrorListener() {
                        @Override
                        public void onErrorResponse(VolleyError error) {
                            // 응답 실패 시
                            Toast.makeText(RequestActivity.this, "로그인 실패", Toast.LENGTH_SHORT).show();
                        }
                    }
            );
            // 3. RequestQueue에 Request 추가
            requestQueue.add(request);

        });
        // 4. 응답 결과 확인
    }
}
네트워크 통신 4단계
0. Internet 권한 부여!! (AndroidManifest.xml)
1. Volley 라이브러리 추가
2. RequestQueue 객체 생성
3. Request 객체 생성: StringRequest
4. RequestQueue에 Request추가!!
- 2. RequestQueue 객체 생성
requestQueue 가 null일때,
if(requestQueue == null){
requestQueue = Volley.newRequestQueue(getApplicationContext()); # 페이지 정보 반환
}
- binding.btnLogin.setOnClickListener(v -> { # 로그인 버튼 눌렀을때
2. Request 객체 생성
String login_id = binding.etID.getText().toString(); # login_id에 문자열 저장(ID)
String login_pw = binding.etPW.getText().toString(); # login_pw에 문자열 저장(PW)
- String url = "http://192.168.70.91:5022/login"; # http://나의 IP:포트번호/login
url += "?login_id="; # http://나의 IP:포트번호/login?login_id=
url += login_id; # http://나의 IP:포트번호/login?login_id=입력받은ID
url += "&login_pw="; # http://나의 IP:포트번호/login?login_id=입력받은ID&login_pw=
url += login_pw; # http://나의 IP:포트번호/login?login_id=입력받은ID&login_pw=입력받은PW

- 3. Request 객체 생성
StringRequest request = new StringRequest(
Request.Method.GET, # GET or POST 방식 결정
url, # 이동할 url
new Response.Listener<String>() { # 응답 성공했을때
@Override
public void onResponse(String response) {
// 응답 성공 시
Toast.makeText(RequestActivity.this, login_id + "님 환영합니다", Toast.LENGTH_SHORT).show();
}
},
new Response.ErrorListener() { # 응답 실패했을때
@Override
public void onErrorResponse(VolleyError error) {
// 응답 실패 시
Toast.makeText(RequestActivity.this, "로그인 실패", Toast.LENGTH_SHORT).show();
}
}
);
- 4. RequestQueue에 Request추가!!
requestQueue.add(request);
● 플라스크 서버 코드 (Jupyter Notebook 실행)
from flask import Flask, request
app = Flask(__name__)

@app.route('/')
def index():
    return 'Hello World'

@app.route('/login', methods=['GET', 'POST'])
def login2():
    login_id = request.args['login_id']
    login_pw = request.args['login_pw']
    print(login_id, login_pw)
    return '로그인 페이지'

if __name__ == '__main__':
    app.run(host='192.168.70.91', port=5022)   # 내 IP주소, 포트번호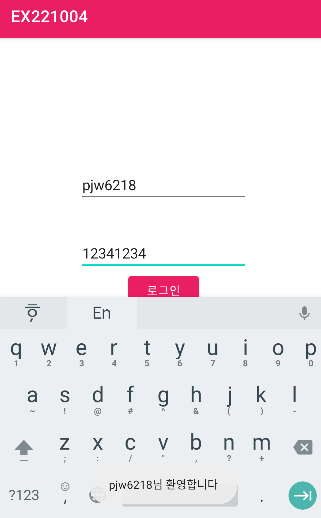
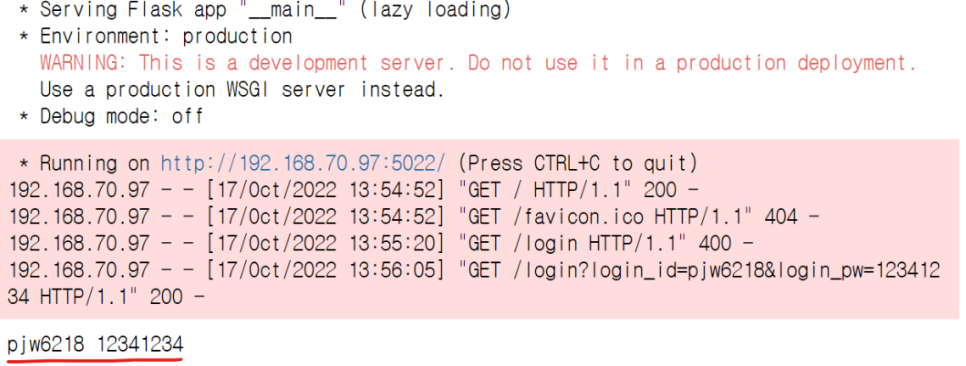
플라스크 서버 ID, PW 접속 결과 화면
'개발 공부 > 안드로이드 스튜디오(코틀린)' 카테고리의 다른 글
| 안드로이드 스튜디오(노래 재생) (0) | 2023.10.18 |
|---|---|
| 안드로이드 스튜디오(Web 뷰) (0) | 2023.10.18 |
| 안드로이드 스튜디오 (네트워크 통신) (1) | 2023.10.18 |
| 코틀린 람다식 함수 (1) | 2023.10.18 |
| 안드로이드 스튜디오(문자열 배열, 게시판에 게시글 추가/삭제) (0) | 2023.10.18 |


